Stop motion puppet: Silicone hands
This post continues detailing the creation of the puppet which we used for my sons school project. Today I am talking about how we created the "poseable" silicone hands.
Creating the hands for this particular character posed some unique challenges. The armature we were using was the smallest size available, meaning the hands were smaller than average for a stop motion puppet. As the fingers need to be poseable while animating, each finger requires an internal wire which can be bent to shape. I wanted to keep the proportions of the character as anatomically correct as possible, however in the end we had to settle for larger than average hands on our puppet:
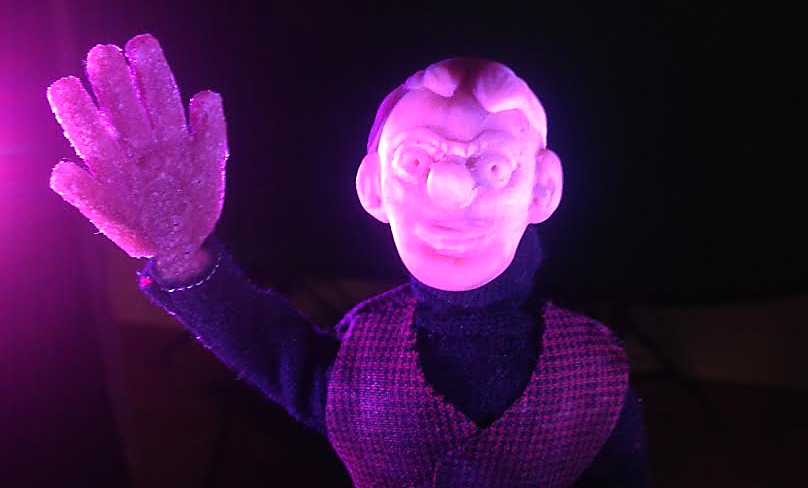
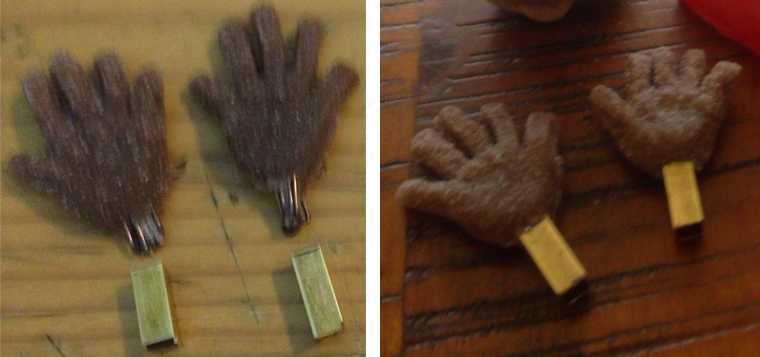
Notice the furry appearance of the hands? This was a mistake caused by using too much mould release, more on that below..
I started by tracing my hand and taking a photo of the armature against an A4 sized piece of paper, then sizing them up in Photoshop. The idea was that I could then print the finished items to use as reference when sculpting the hand (shown top-right in the photo below). The image below shows the size I had originally hoped to create the hands. Unfortunately this was just too small to allow for an aluminium wire armature to fit inside.
After experimenting with different wire thicknesses and hand sizes, I printed out a final set of hands to use as reference

Then I cut each hand out and traced the outline onto a plastic takeaway container lid. I distributed even amounts of "Sculpey" oven-bake clay between the two hands. Sculpey is a fantastic sculpting medium for small scale work. It can be baked hard in a regular household oven. In this instance I wont be baking the Sculpey hard, but it can be used just as a sculpting medium.

From here I sculpted the top half of each hand. The bottom half of the sculpt (in this case the palm of the hands) will be completed after creating the upper mould.

To create the upper mould I built a wall around the sculpted hands. I have since learned that lego bricks are great for building this wall, or alternatively a foam-core sheet can be used to build a box which is put together and sealed with a hot glue gun. I used this technique for the shoes (to be explained in my next post).
I had not learned of such techniques when I did this step, however, so my walls are made of more Sculpey:

Time to mix a moulding compound and pour the mould! The rule of thumb with moulding and casting is that if you want to cast a soft object use a hard mould, if you want to cast a hard object use a soft mould. I could have used plaster of paris for this mould, however I went with rigid polyurethane as it is a little more durable:

Rigid polyurethane products typically have 2 parts (Part A, Part B) which are mixed together then poured over the sculpt to set hard. You will notice also in the photo above a mould release I used to help stop the sculpt from sticking to the mould. For this particular mould, I could have left the mould release out all-together, and I wish I had as I put too much on which left the final silicone hands with a furry appearance! Oh well, the next ones will be better :) The polyurethane goes opaque as it sets, this particular one had a yellowish colour, here it is partially set after around 12 minutes:

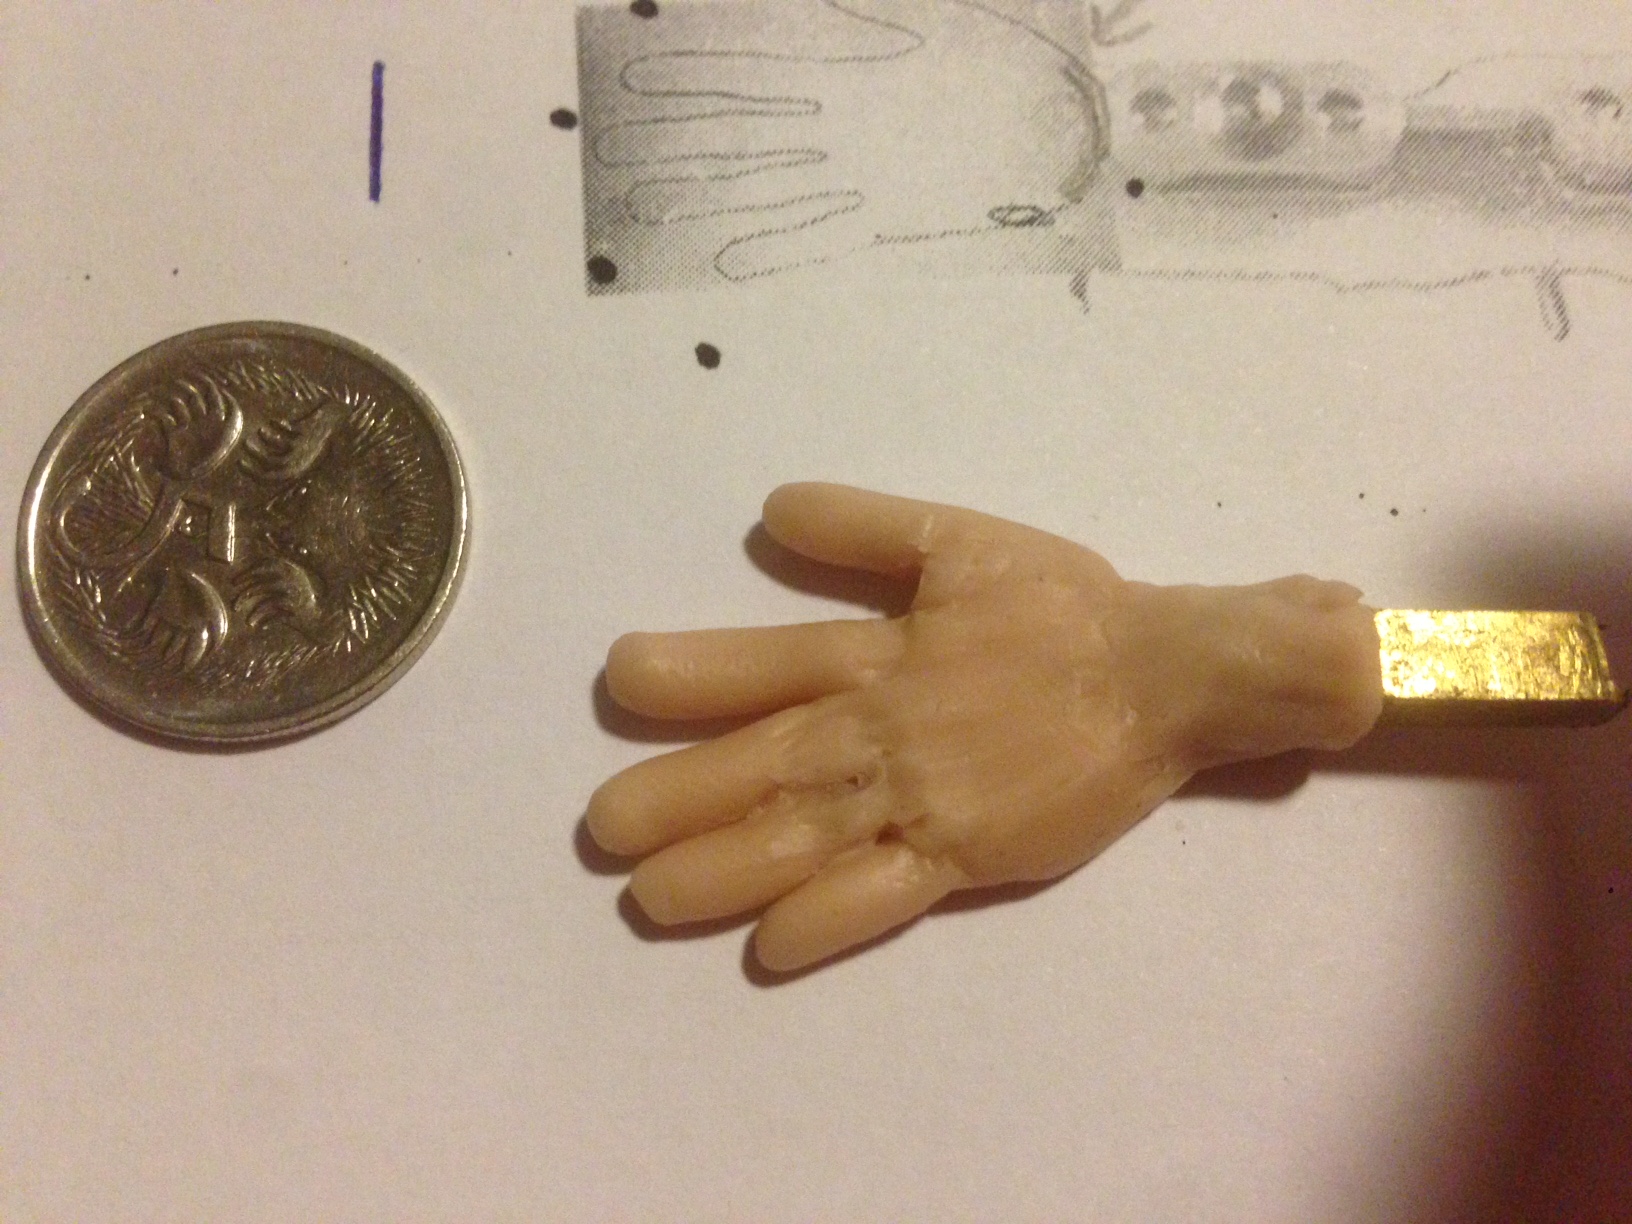
At this point I cut some aluminium jewellers wire and super-glued it together. The wire is used for the fingers, as well as to join to the K&S tubes to fit the hands to the armature (more on this later). In the photo below you can see the general shape. The glue is applied just above the sculpey clay blob (being used to hold the wires in place while the super-glue dries).

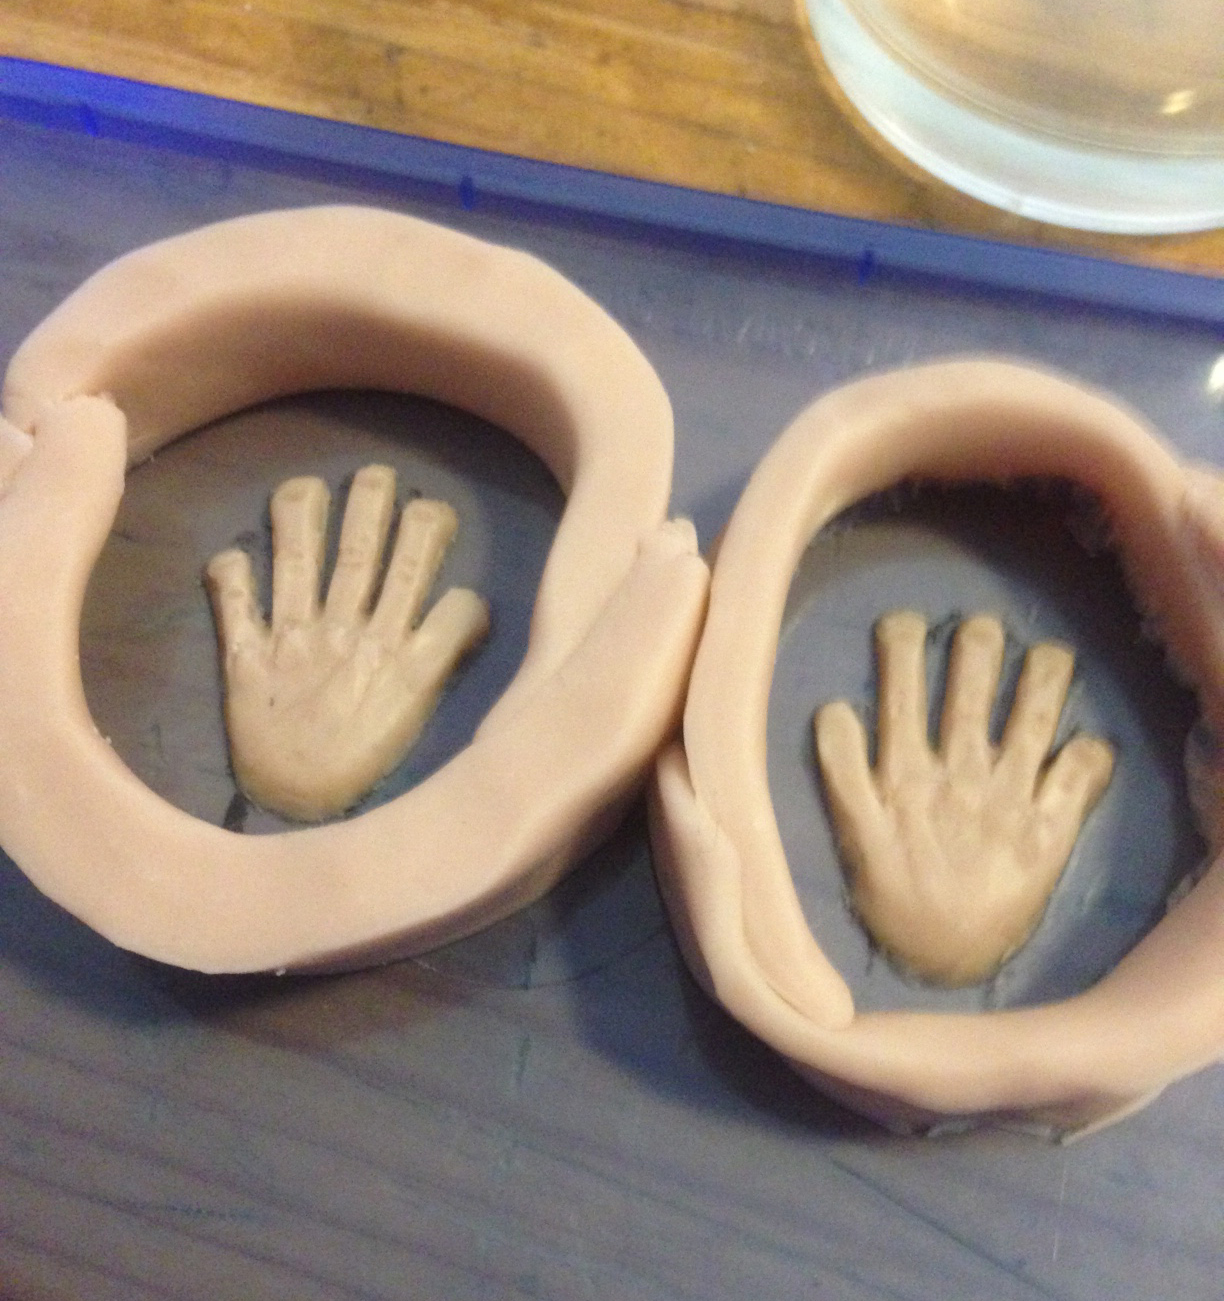
Once the mould has set it is flipped over and the bottom of the hand (palms) can be sculpted:

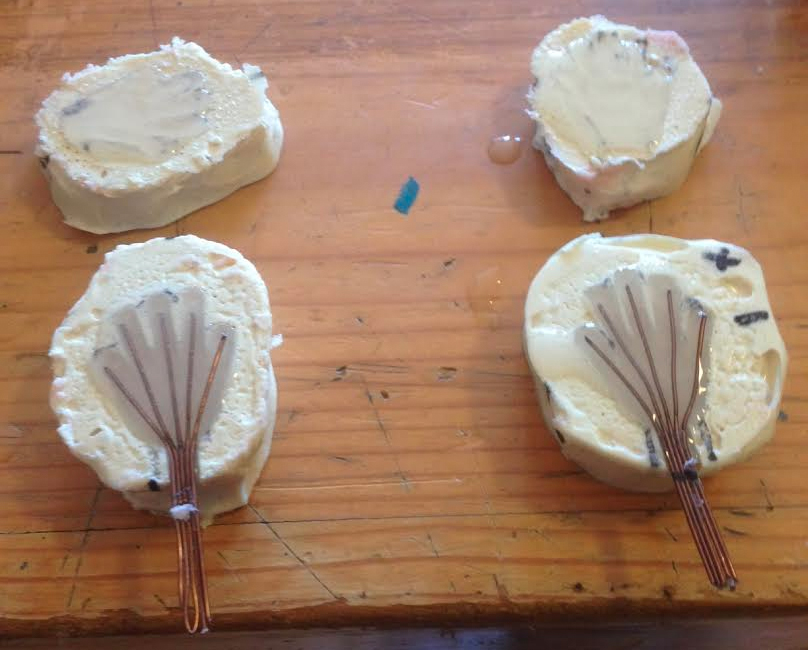
Then the process is repeated to create a mould for the bottom of the hand. The photo below demonstrates a few things:
- A notch has been cut into the mould so the wire can be positioned
- Marks have been made on the mould to indicate where the two halves fit together. You can also create "keys" to lock items in place (I will explain this in a future post).
- The mould release left strange bubbles, and I poured the urethane a little too quickly further aggravating the problem. Hence the mould surfaces are broken / not smooth. Dont do that!

Silicone is then mixed in a similar fashion to the urethane (equal Part A / Part B) and (ideally) put in a "vacuum chamber" to remove bubbles. I don't own a vacuum chamber so I use another technique to reduce bubbles as much as I can: Pour the silicone from a height, and pour it slowly! This allows bubble to dissipate as the silicone flows. There are different types of silicone available, and you want to go for a softer silicone such as a "P20" as I have used here. Your supplier should be able to help you pick a good silicone for use in puppets. (Here in Australia I bought mine from dalchem.com.au and they were very helpful). You also want to use an "Addition cure" silicone which doesn't require the use of an oven to cure.
The silicone can be coloured with acrylic paints simply by mixing the paint in, however for the first casting I did not colour it so that I could see how the wire was sitting inside. The silicone is poured into the bottom and top mould halves very slowly - allowing, as much as possible, for the silicone to "flow" into each crevice like a very slow moving river. I hope that makes sense - uncured silicone is quite viscous like honey. It needs to be poured until it sits a little above the surface of each half:
..then the moulds are pressed tightly together until dry, thanks mr brick:

After drying for 6-8 hours, here are the moulds ready to be pulled apart:
After removal from the mould, there will be silicone edges that need to be carefully snipped off with nail scissors. Here are two finished hands. Next time they wont look furry! I guess we can pass these ones off as gloves :)