Stop motion puppet: Armature and Padding
I was lucky enough to pick up some paid stop motion work recently, and I wanted to explore a few ideas, learn some new puppet construction techniques, and do some testing before diving into the final project. As it so happened, my son Kaiya had a project on the Australian gold rush to complete, so we joined forces!
Below is the result of our busy weekend of sculpting, gluing, painting and animating.
https://www.youtube.com/watch?v=HlokHgIurNQ
Over the next few posts I plan to show the processes we used for the puppet construction and animating. This post details the basic armature padding.
I purchased ball and socket armatures from http://www.malvern-armatures.co.uk/ While the armatures are not cheap they can be re-used for other projects (and for the paid job I have to complete). The Malvern armatures are very competitively priced and the best I have used, with minimal bulk and accurate proportions.
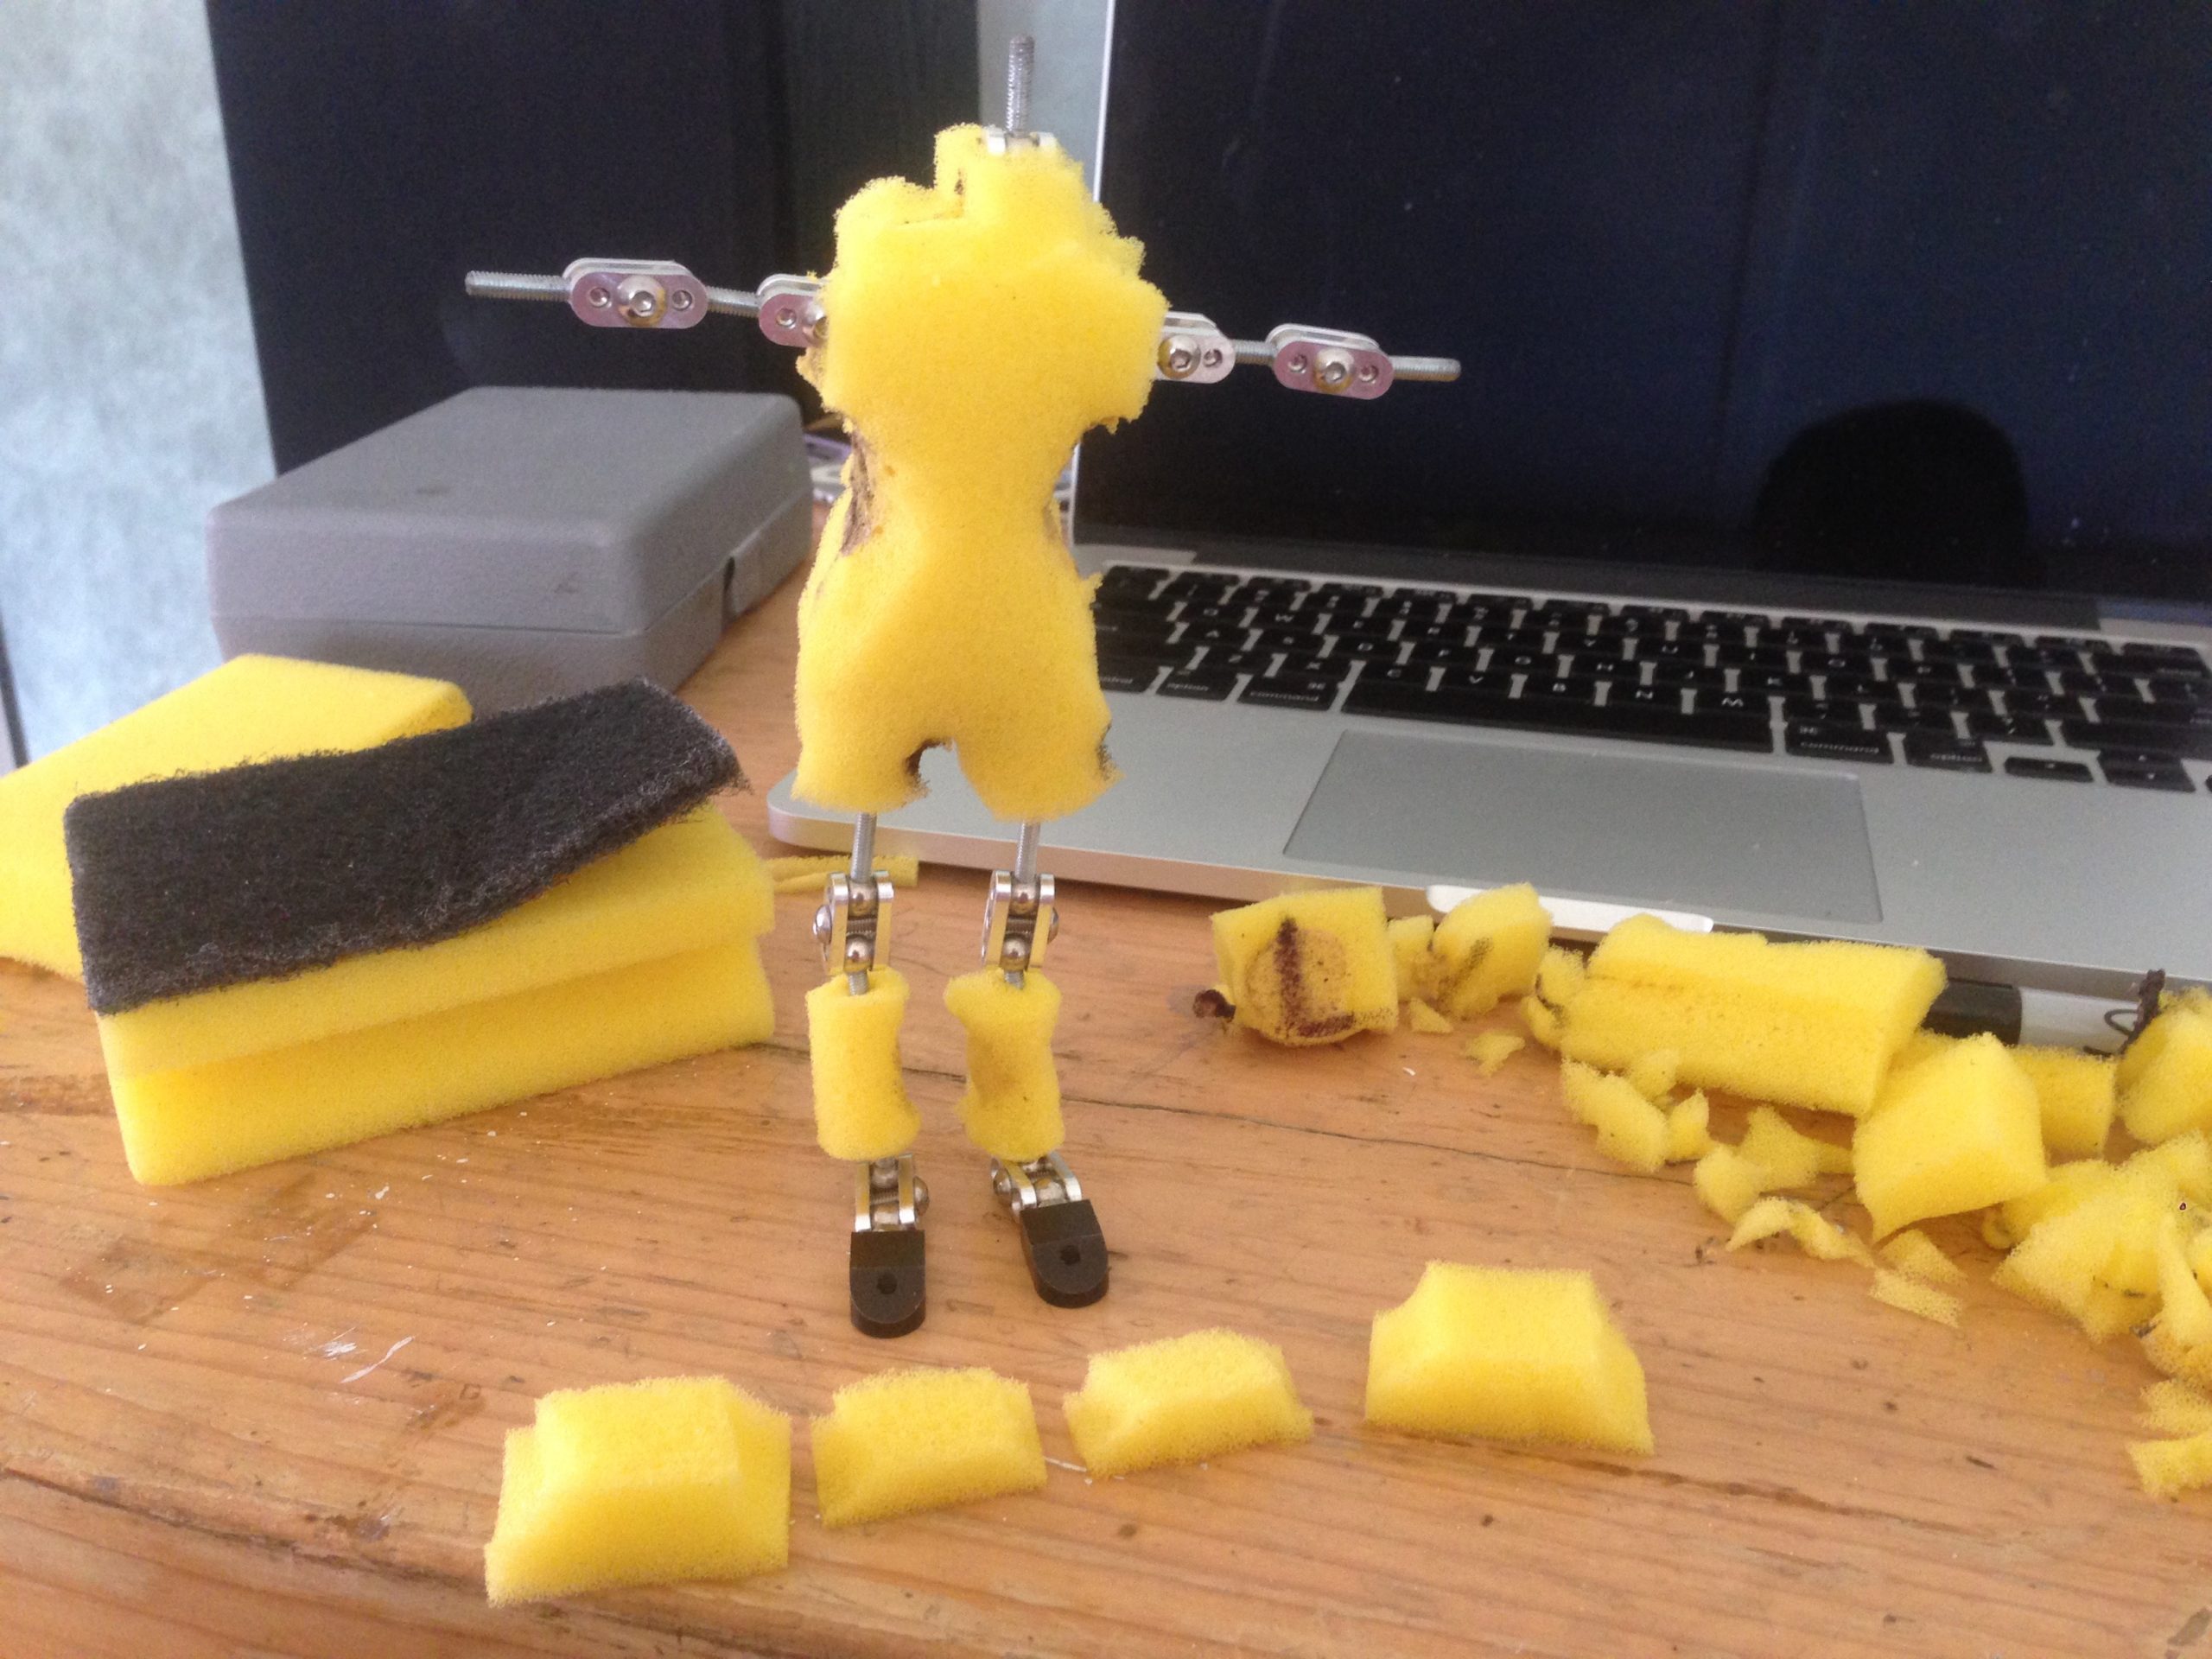
Sourcing foam in Armidale, Australia was not as easy as one would expect. Where I live there are no rubber suppliers and the only internet suppliers I could find sold foam by the truckload. I nearly went and bought a foam mattress at one point, which still would have been way too much material for my needs! In the end I padded the armatures using foam kitchen sponges. The sponges came with scouring pads attached, which I was able to peel off:

The sponge was cut in half vertically and the two resulting sponges were used for the front and back of the puppet, these were glued around the armature using contact adhesive:

The contact adhesive remains flexible when dry making it a good choice, as this will allow the puppet to move and flex.
In the photo above you can see a rough black outline drawn into the sponge with a laundry marker. I ensured no adhesive was applied inside of that line as I was concerned it may leak into the ball and socket armature and seize it up. The adhesive is applied to both surfaces then left until just touch dry, before the two halves are pressed together to dry more thoroughly (around 1 hour). I held the halves together with a brick:

After drying the foam is cut to a basic shape for the torso using a pair of nail scissors (small scissors). This takes a while and leaves little bits of foam offcuts floating around everywhere. The shape needs not be too clean, however, as the clothing will even out any smaller lumps and bumps.

Trapezoid shapes are cut and wrapped around each limb, and glued with contact adhesive.

It is important that the tension bolts on the ball-and-socket armature can be accessed while animating. The image below shows the padding completed. You can see there is no foam covering the knee, and holes have been added near the hips. This allows the tension to be adjusted with an allen key throughout the filming.
In the next post I will be talking about how the hands and feet are made, by moulding in polyurethane and casting in silicone.