3d printing heads for stop motion puppets (Part 2)


I have found there is currently very little information online regarding 3d printing as it relates to the puppet construction workflow. In particular, construction of moving mechanical parts such as eyes and eyelids are not explained.
In this post I want to briefly show the solutions I have come up with for 3d printing "mechanical" parts. This involves heads with movable eyes and replacement faces as well as movable wings on stop motion fairy characters.
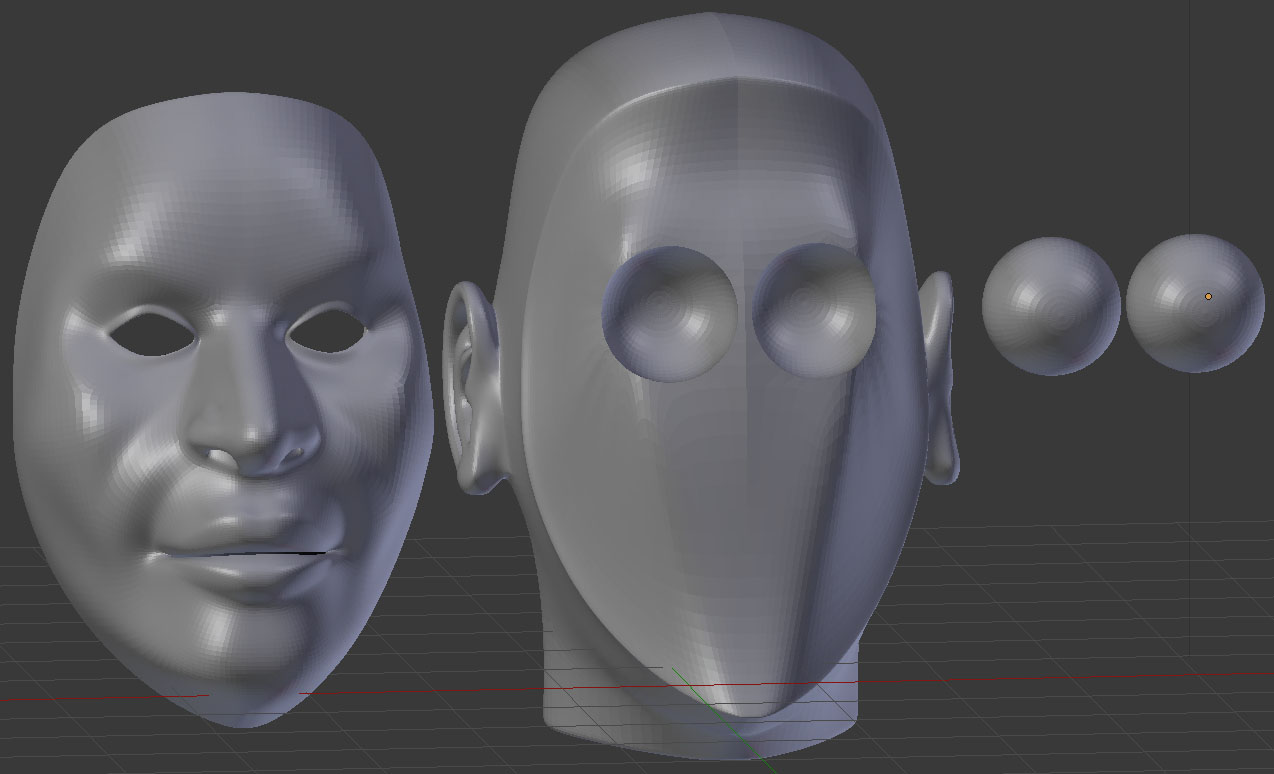
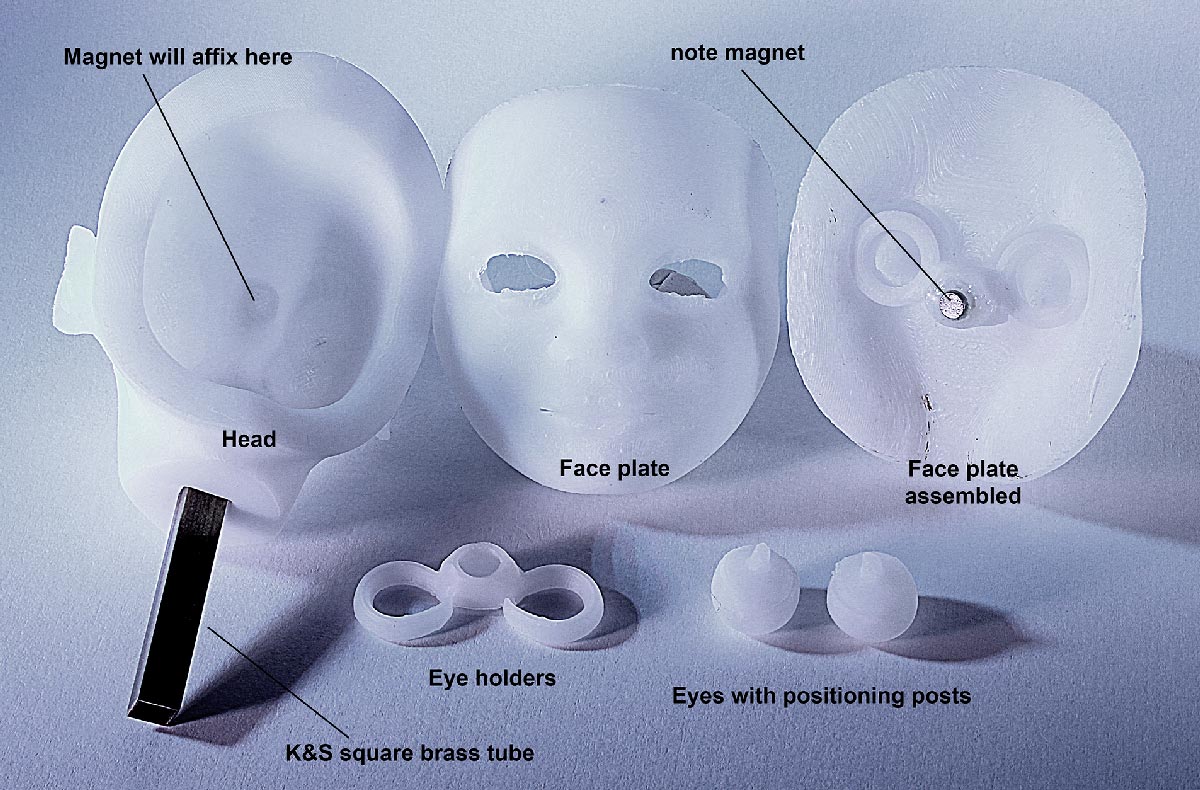
In my last post I demonstrated a model which used replacement jaw pieces. The model I am discussing today, however, uses a replacement face plate. This has the advantage that I will have a little less cleanup work (after animating) to hide seam lines between adjoining pieces, and I will have greater freedom to control facial expressions in the upper part of the face (frown wrinkles, closed eyes etc). The disadvantage being that it will be harder to create smooth animation when there are slight inconsistencies between the face plates, given that the entire face is being replaced between animation frames.
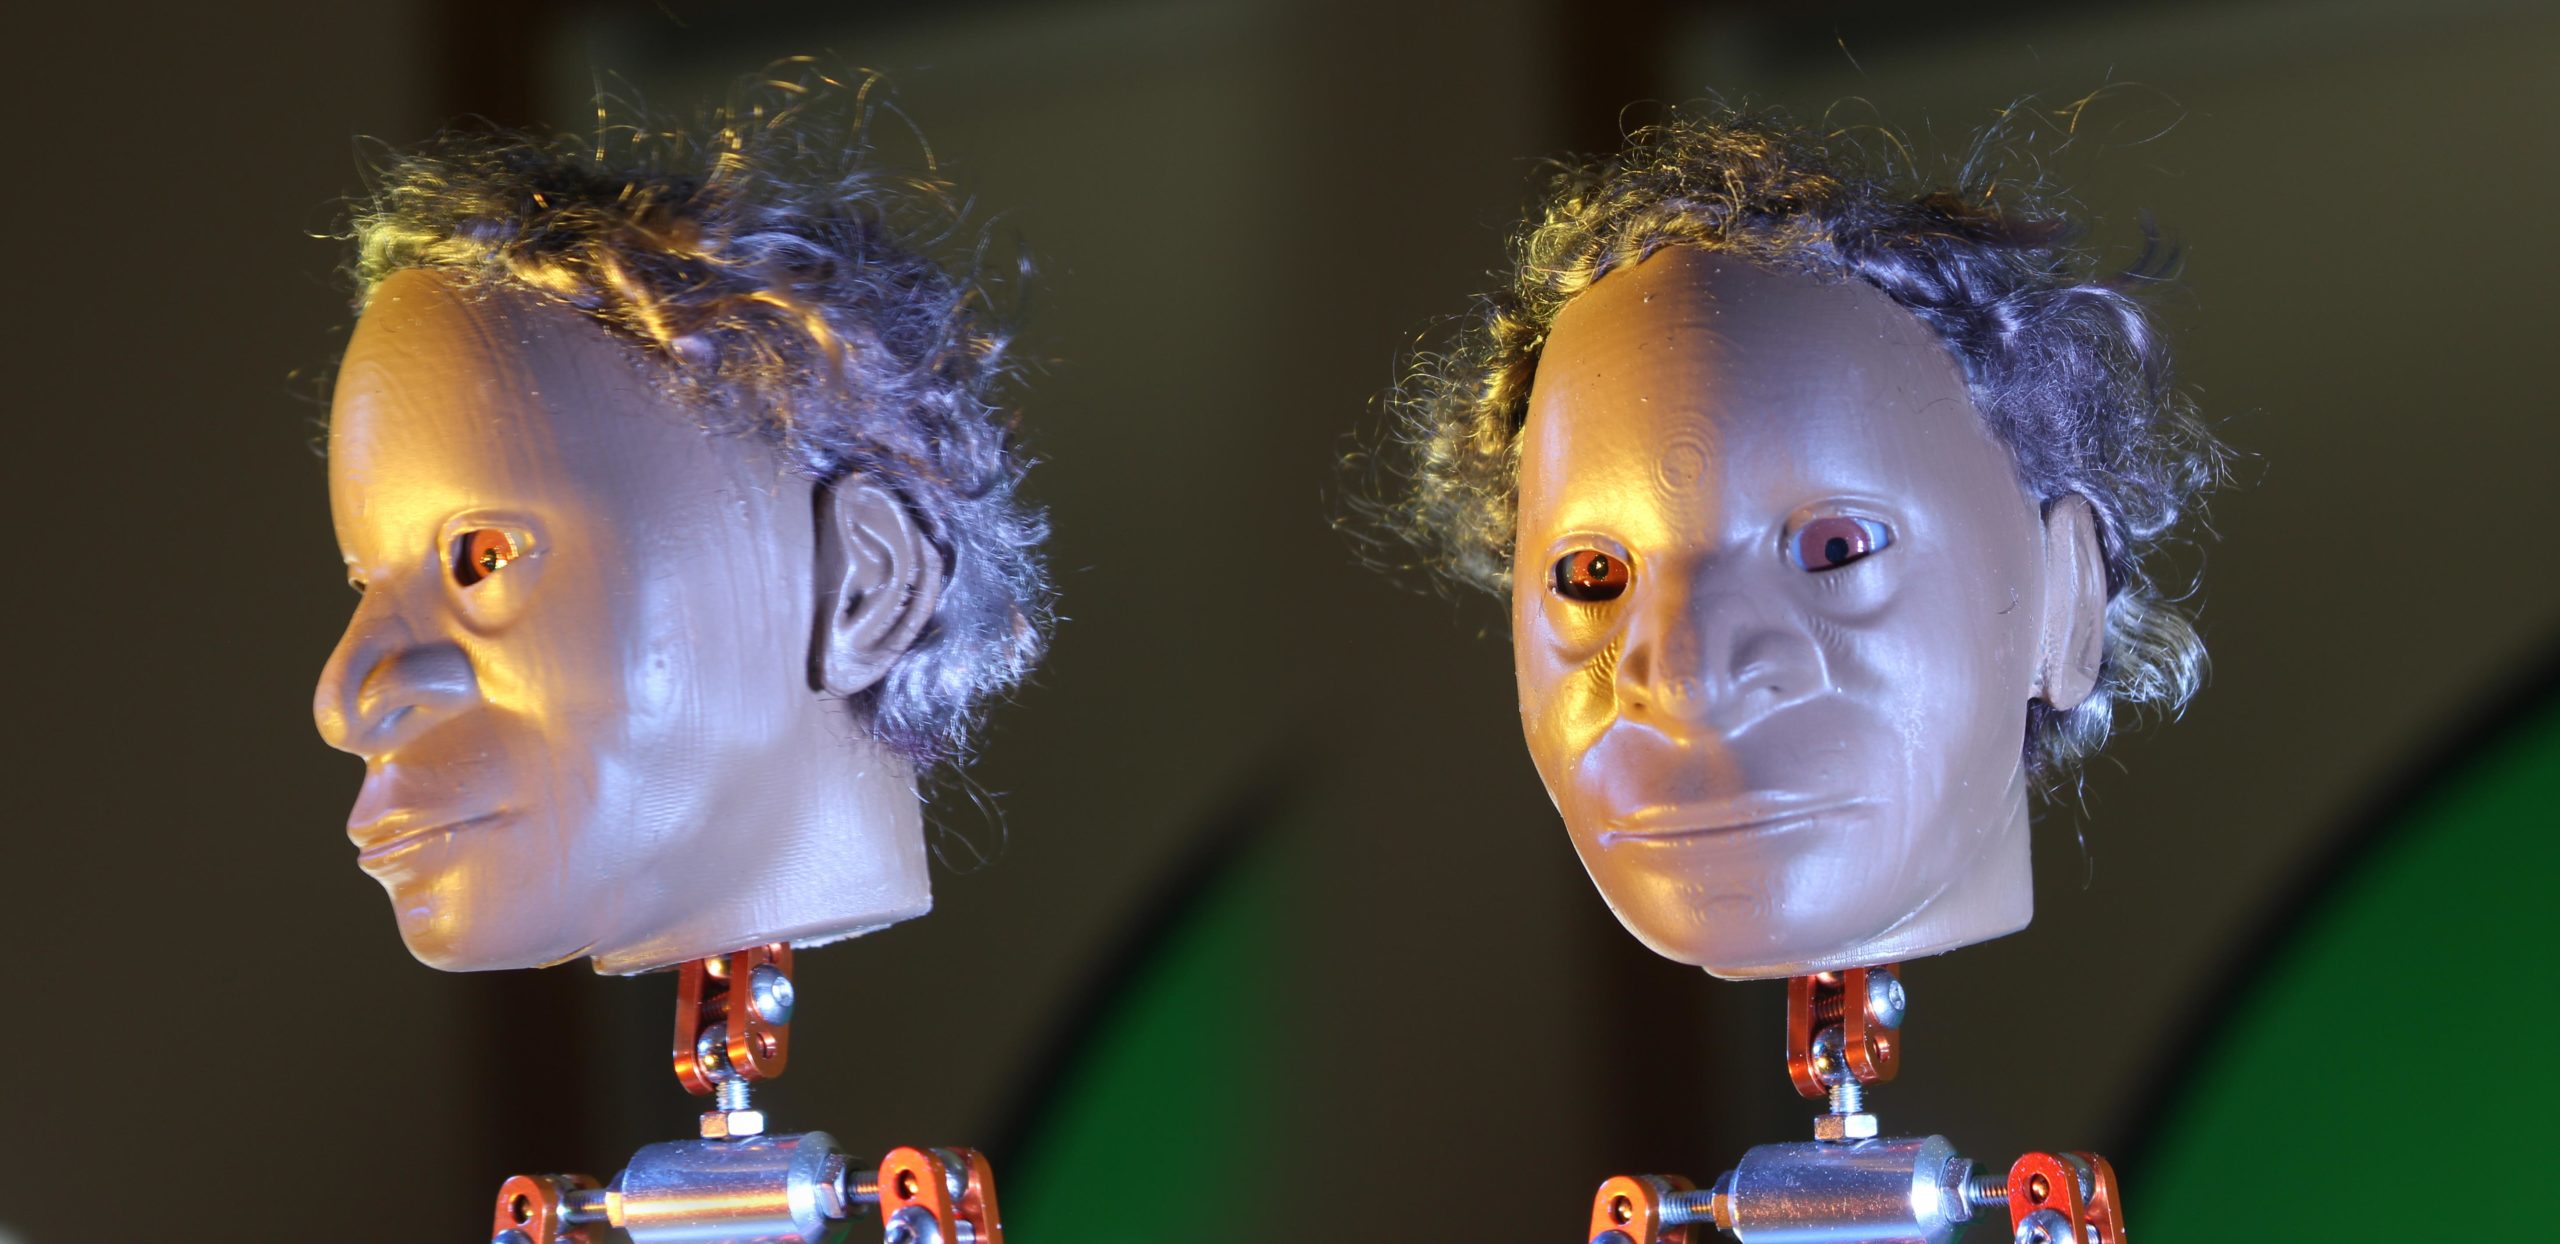
I have experimented with different methods for getting movable eyes to work in a 3d print. Currently my solution involves eyes that are held against the faceplate. The video below shows how I am achieving this.
https://youtu.be/bpaGkW7OZRg
I think it would be preferable to have the eyes attached to the back of the head rather than the face plate, so that I do not need to re-paint multiple eyes for each of the different face plate "expressions". I endeavour to explore this in a future puppet.
The wings of this model (shown in the image below) will also be 3d printed, and utilise magnets to hinge to the body. This should allow me freedom to animate the flapping of the wings, and replace with different wing shapes if/when required.
In my next post I will be discussing painting and finishing these parts, and talking about solutions I am using for smoothing prints with acetone and cleaning up pieces with a Dremel rotary tool. One thing I really like about stop motion is that there are so many solutions and no "one correct method" for any technique. With this in mind, if anyone reading my blog has ideas or other solutions to share I would love to hear from you :)